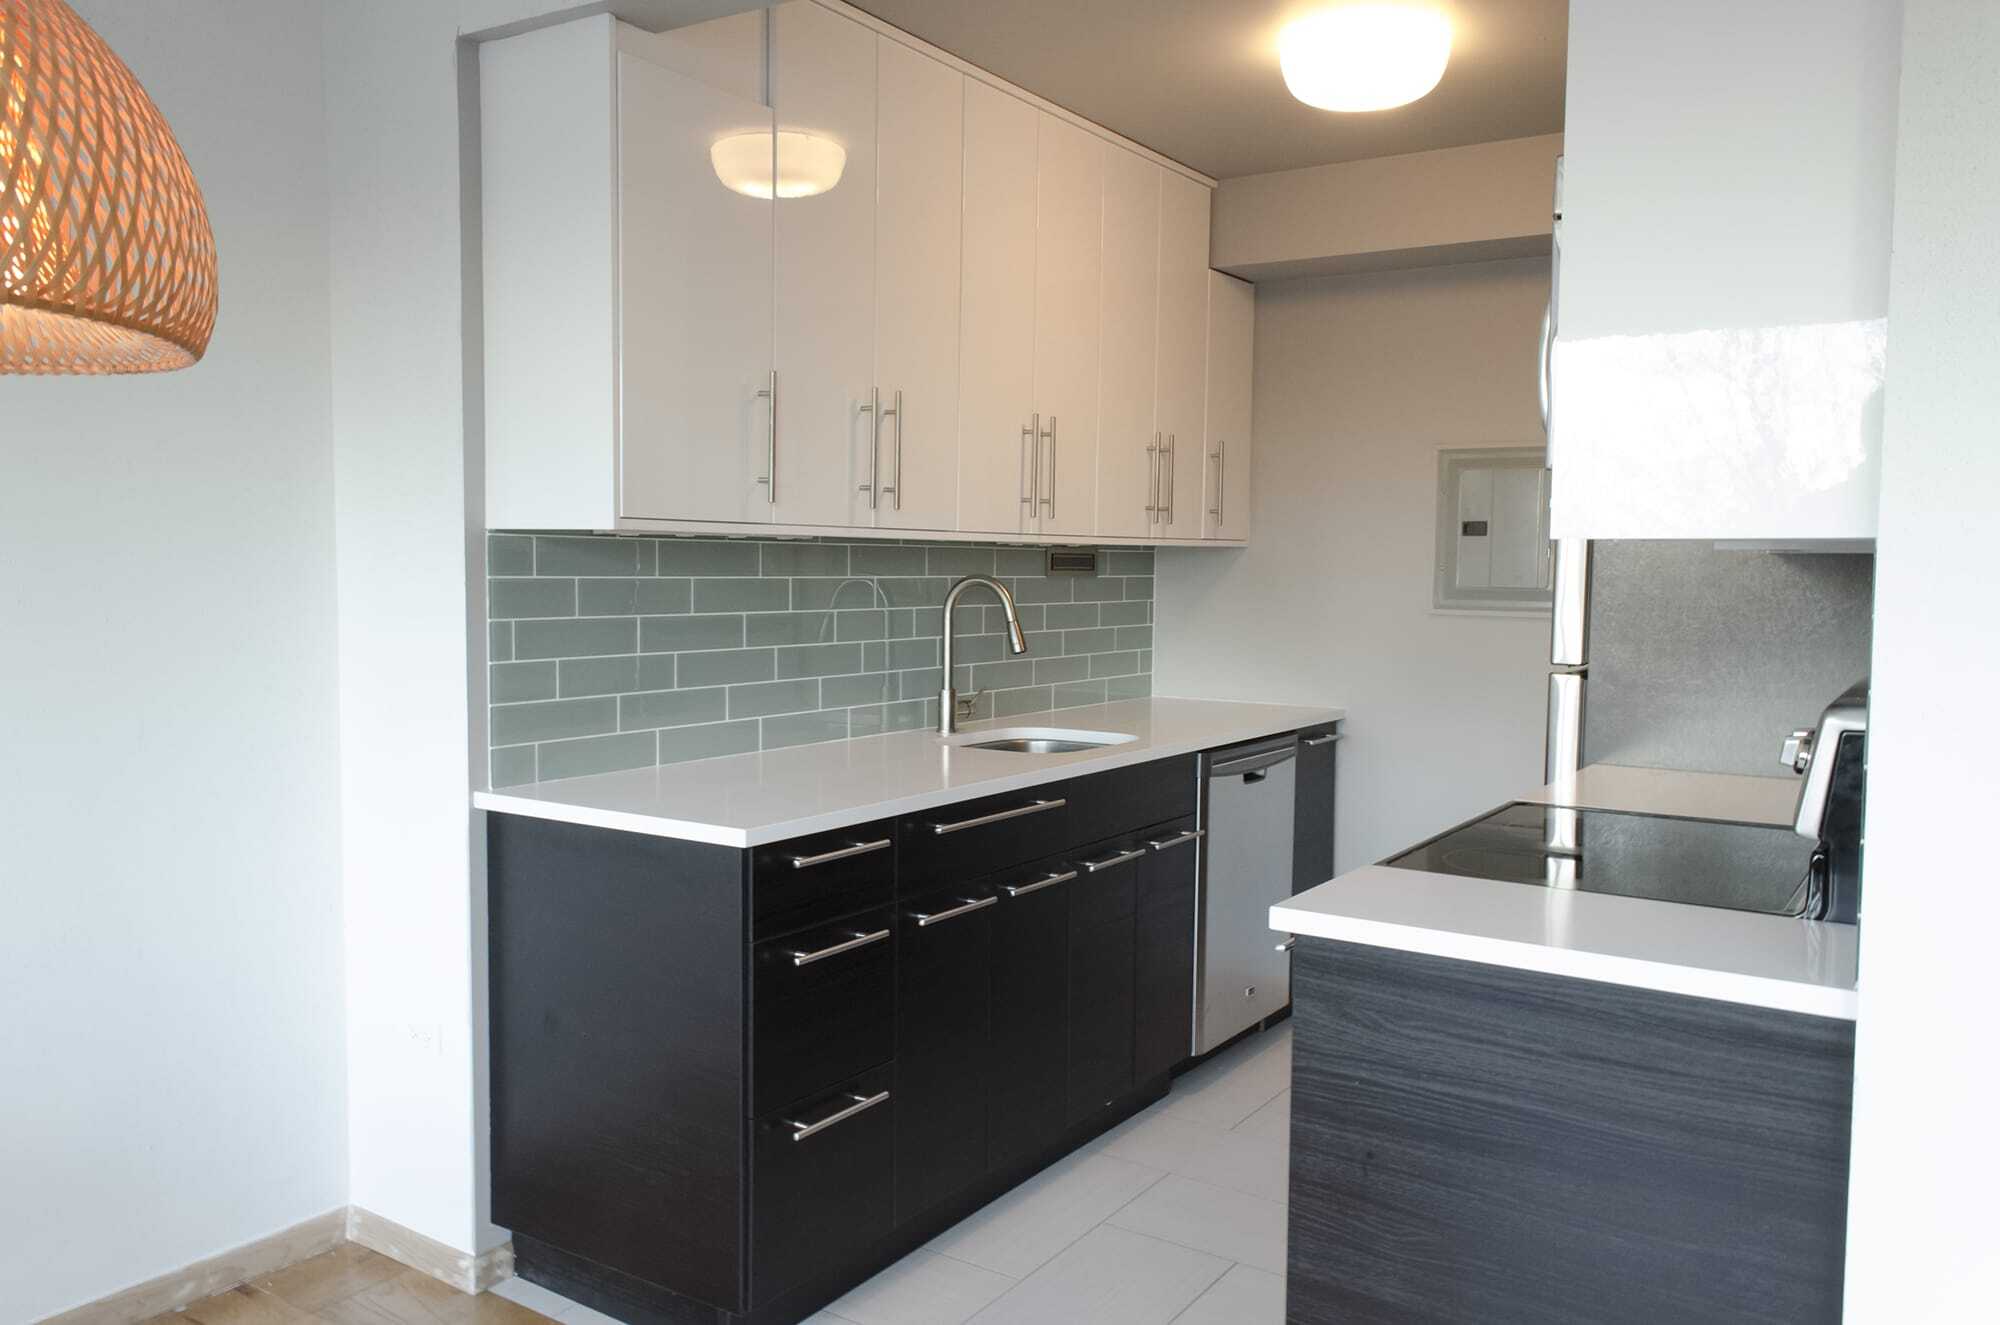
This Seattle kitchen remodel packs loads of creativity and style into a small space.
Last month, we worked on this small apartment kitchen in located in downtown Seattle. While the kitchen is small, and the layout is very simple, the finishes and textures that the owner chose, combine to create a very compelling and stylish space.
The kitchen hadn’t been remodeled since it was built in the 1960s, so there was a lot to do to bring it up to date. One of the biggest changes we made, was to remove the wall that separated the kitchen from the dining room. Although it didn’t add any significant square-footage to the small space, it made the kitchen feel ten times bigger!

Removing the wall between the kitchen and dining room, made a huge difference, allowing more light in to the kitchen, and increasing the sense of space
The owner chose IKEA kitchen cabinets for their contemporary style, and budget friendly cost. Here we have IKEA’s Abstrakt white on top, and Gnosjo black for the bottom. Not only does it look ultra cool, but having a dark color on the bottom, and a lighter color on top adds height and dimension to the space.
Not content with a simple pattern for the floor tile, the owner came up with this unique pattern using 12×24″ porcelain tile.
The tile backsplash is made up of 4×12 back-painted clear glass tiles. rather than going for the simple brick-style layout, we chose to offset the tiles in 2″ increments. For the grout color, the owner really wanted to go with white, but in a kitchen setting I was concerned it wouldn’t stay white for long. So we decided to go with epoxy grout, which is stain proof, and doesn’t require sealing.
In keeping with the clean, uncluttered design, we removed all the outlets from the backsplash, and hid them under the cabinets. These plug strips, made by Wiremold, are very challenging to install, but offer the lowest profile outlet strip on the market. If you decide to install these in your kitchen, prepare yourself to hear a lot of griping and complaining from your electrician!
Funny that one of the smallest kitchens we worked on last year turned out to be one of my favorites. I guess it just goes to show that small spaces can still make a big statement.


Hi,
That plug mold looks fantastic! We had our outlets moved in a remodel. The electricians are insisting there must be a junction box under the cabinet, no way to avoid it. Yet, our last home had it done like yours and we see it done without the junction/adaptor boxes regularly. What should we be requesting of/purchasing for them? We’ve been fighting this battle for weeks now. The strips and boxes look sloppy and can be seen from the living room. The junction boxes hang about 3/4″ below the cabinet. Help is appreciated!
Hi Lesley. I think the problem your electrician is having is that there is very little room inside the plugmold to make the electrical connections. My electrician had trouble with this too. There’s not enough room for wire nuts, so hended up having to use a different style of wire connector I believe it’s called a “butt splice”. Hope this helps
Can you provide details on the brand of 4″x12″ tile and approximate price per square ft?
Hi Jack, I don’t know much about the tile, except that my customer purchased it at Tile for Less here in Seattle. It’s a “back painted glass” tile, and it’s tricky to work with. It requires a special blade in order to get clean cuts without lots of chips. Hope that helps.